

Required tools
Cordless screwdriver / drill
12mm and 5mm wood / metal drill
Dremel with milling attachment
Utility knife
Ruler
I don't think I need to mention health & safety, do I? So keep that in mind!!
First of all, you have to free the handle from all attachments!
Once you've done that, continue below

Next, you need to remove the nuts.
Then draw a line at the level of the lines marked in red.
Draw another line with the help of the points marked in blue. Use the ruler and the knife. Once you have done this, you have determined the white dot.
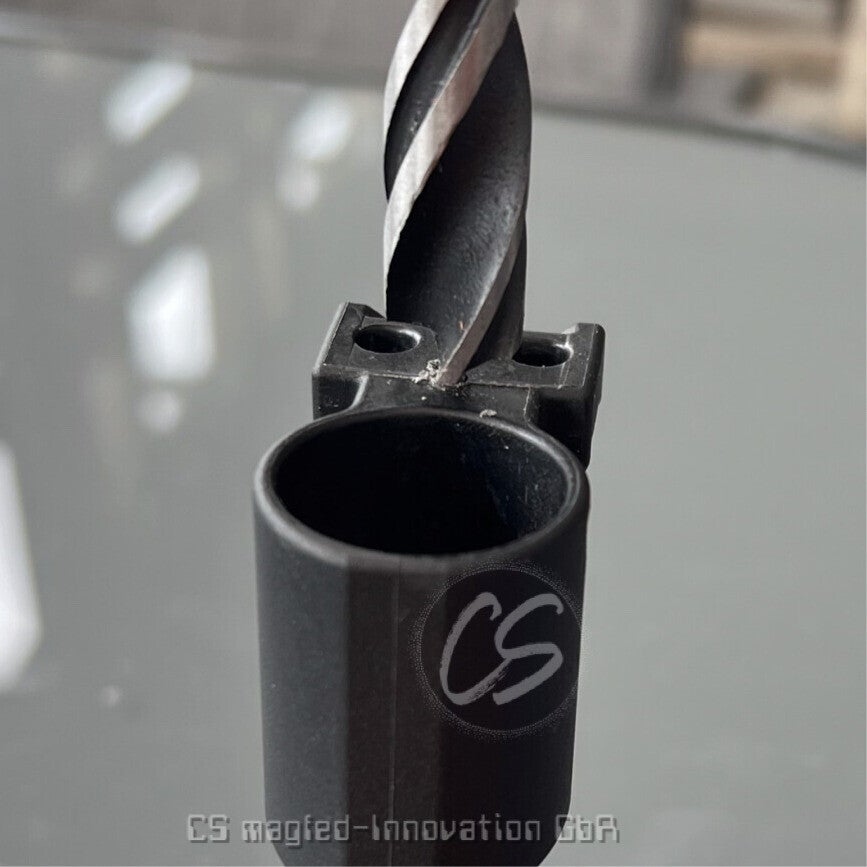
The white dot represents the mark for the drill.
You have to drill at an angle of 90° to the worktop.
Drill 12mm wood/metal drill
Drilling depth = 8mm

If you have removed some material from the regulator body, that's not a problem!
There is only the body here, there is no air through!

You should check in between again and again whether you have drilled deep enough!
Again! It's not bad if some material wears off the regulator body!
Drill 5mm Wood/Metal Drill
Drilling depth = Complete by
Again, drill at 90° to the countertop!
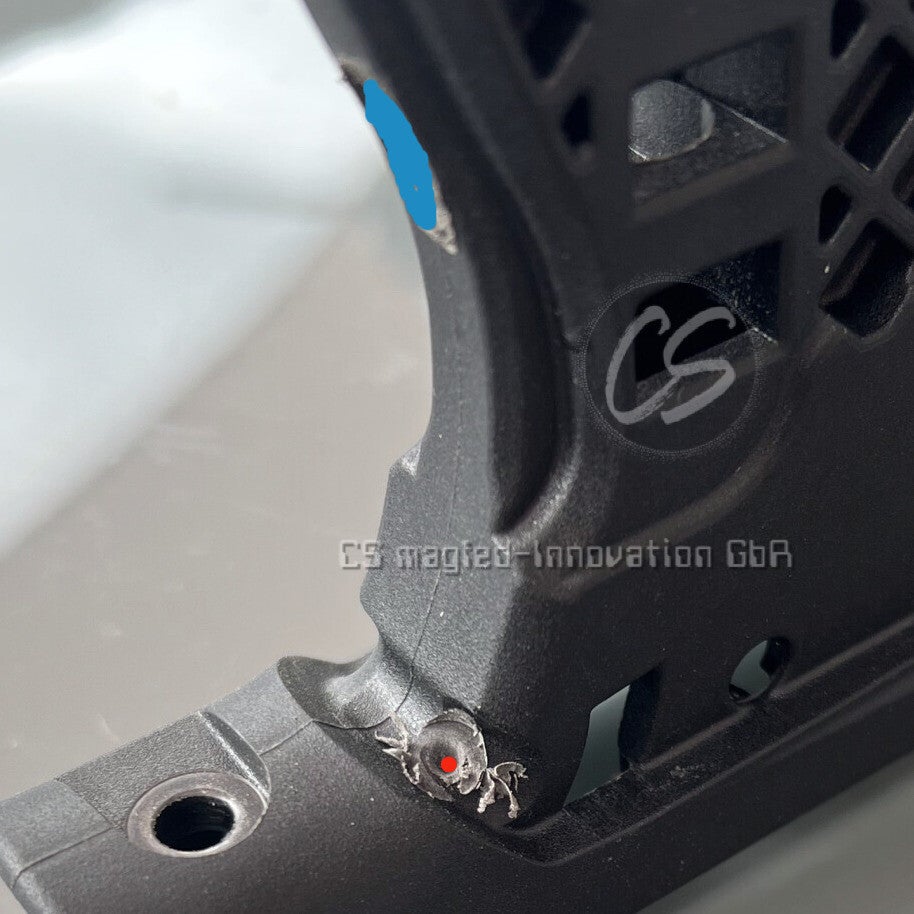
If you have pierced the handle with the 5mm drill, you will land at the blue marker.
I hope you have a firm base under the handle! At least now you should put something underneath! Drill diagonally with the 5mm drill on the LEFT side at the level of the red marking.

With the Dremel you have to mill a shaft. Starting from the drilling exit to the diagonal bore. Don't overdo it! Especially at the level of the Valve! You can mill a hole in there pretty quickly! Don't forget to deburr the edges!

If you have the compatible Airstock for the EMF100, this is already the last step! Here you have to create some space for the hose with the Dremel. It is enough to widen the hole a bit!
The picture shows how much space is needed for the ID100 body!
Conversion for ID100 body

For the external air duct of the ID100 body, an opening must also be created at the back of the handle with the 5mm drill.

With the drill you have to create a channel parallel to the upper edge to the diagonal bore. Once you have done that, then you only have to make room for the hose with the Dremel. Take a look at the picture above.

Finally, all you have to do is mill a shaft. To do this, simply mill an 8mm deep shaft on the left or right side as shown with the Dremel. This only serves to loosen the hose with the help of a small screwdriver. This shaft is of course necessary for both variants.
No real instructions are required to assemble the individual components. However, here is some information. The fittings are already glued in by us. The back cap on the bolt must be removed for both variants. You can store it in your gear back. If there are any problems, contact us or talk to us on the field.